Markus Castro
A police clearance is one of those government documents that many Filipinos eventually need, whether for a new job, a business transaction, an immigration requirement, overseas employment, a licensing application, or another official purpose. While getting one used to mean spending a considerable amount of time lining up at a police station, the process has become more convenient with the National Police Clearance System (NPCS).
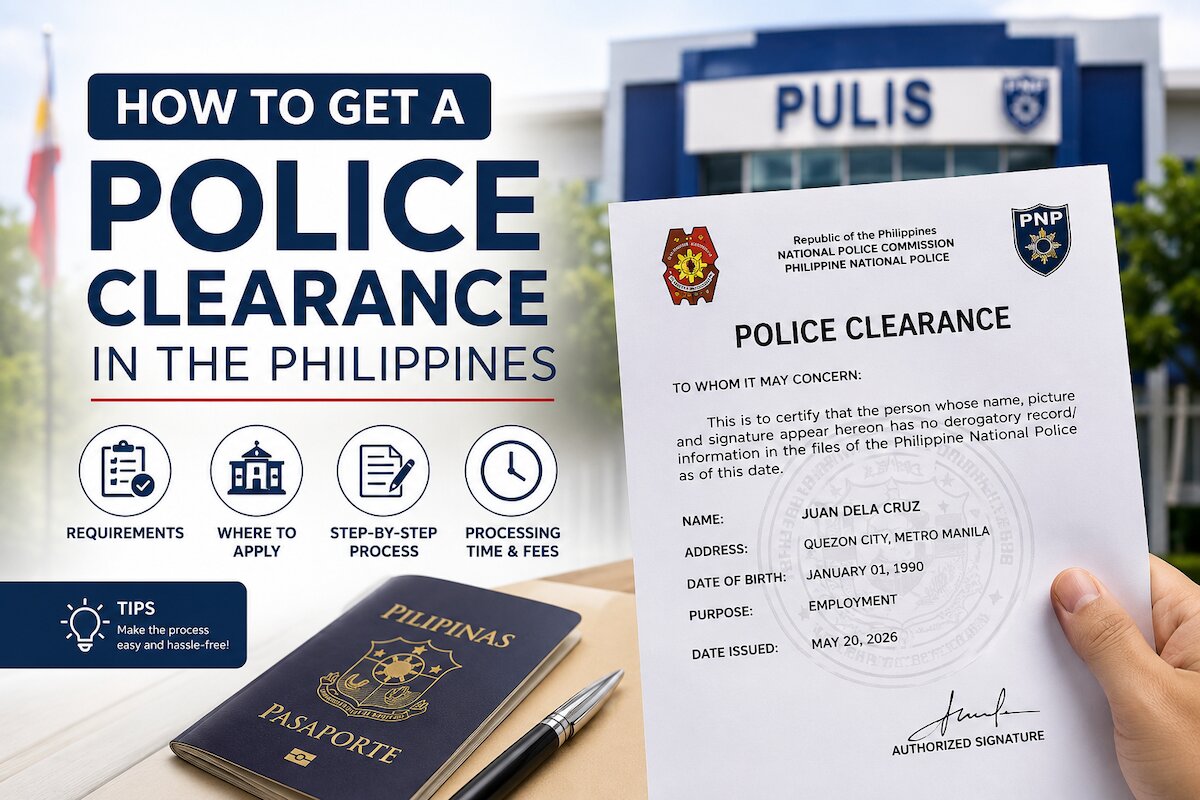
Today, applicants can register online, enter their personal information, select an appointment time, and make the required payment before visiting their chosen police station. The remaining in-person steps generally involve presenting an identification document, having your photograph and biometrics captured, and completing the verification process. The official NPCS describes the system as a nationwide service designed to make obtaining police clearances more convenient.
If you are applying for a police clearance for the first time, the process may seem confusing at first. Which ID should you bring? Do you need to go to the police station before registering online? How much does it cost? What happens if your application gets a “hit”?
This guide walks you through the process in detail, from preparing your requirements to receiving your National Police Clearance.
What Is a National Police Clearance?
Table of Contents
A National Police Clearance is a document issued through the Philippine National Police that serves as a record-checking document based on information available through the PNP’s National Police Clearance System.
It is commonly requested when an organization wants to verify an individual’s criminal record status. Employers may ask for one as part of their pre-employment requirements, while government agencies and other institutions may require it for specific transactions.
The National Police Clearance System was introduced to streamline the traditional police-clearance process by creating a centralized system for applications and verification.
Instead of simply walking into any police station and requesting a clearance, applicants now generally begin by registering through the NPCS, scheduling an appointment, and selecting a police station where the personal verification process will take place.
The official NPCS website currently provides the online application system, clearance verification facility, application tutorials, and information about special clearance certifications.
Police Clearance vs. NBI Clearance: Are They the Same?
This is one of the most important things to understand before starting your application.
A PNP National Police Clearance is not the same as an NBI Clearance.
The National Police Clearance is processed through the Philippine National Police, while an NBI Clearance is issued by the National Bureau of Investigation. They are separate government documents and follow different application procedures.
If your employer, embassy, immigration office, school, licensing agency, or another institution specifically asks for an NBI Clearance, do not assume that a National Police Clearance will be accepted instead.
Likewise, if the requirement specifically says “Police Clearance” or “National Police Clearance,” check whether the requesting organization is asking for the PNP document.
When in doubt, confirm the exact document required before paying the application fee. This simple step can save you from repeating the entire process.
National Police Clearance Requirements
The requirements for a regular National Police Clearance application are relatively simple compared with many other government transactions.
According to the official NPCS application guide, applicants should bring the following to their selected police station:
- One valid government-issued ID
- Proof of payment or payment confirmation
- NPCS appointment reference number
Applicants will also undergo the required biometric, photograph, and signature capture at the police station.
1. Valid Government-Issued ID
Your identification document is one of the most important things to prepare.
Bring the original valid government-issued ID that you used or intend to use to establish your identity during the application process.
Examples of commonly accepted government-issued identification documents may include a Philippine passport, driver’s license, PhilID/National ID, PRC ID, and other government-issued IDs. Because accepted identification documents and verification procedures can change, applicants should check the current instructions shown by the NPCS before their appointment.
Make sure the name and other identifying information on your ID match what you entered into the online application.
This is particularly important if you have recently changed your name, have multiple versions of your name on different documents, or have discrepancies in your birth date or other personal information.
2. Appointment Reference Number
After completing the online application and booking your appointment, you will receive an appointment or reference number.
Keep this information somewhere easily accessible.
A practical approach is to save a screenshot on your phone and, if possible, print a copy as backup. You do not want to spend your appointment time searching through emails or messages for a reference number.
3. Proof of Payment
Applicants who are required to pay should keep their payment confirmation or electronic official receipt.
The official NPCS instructions specifically list payment confirmation among the documents to be presented at the selected police station.
Keep your payment record until your clearance has been successfully released.
How Much Does a Police Clearance Cost?
The amount you pay should be verified directly through the official NPCS payment process, as government fees and transaction charges can change.
Older references to the National Police Clearance commonly cite a PHP 150 base fee, but applicants should not rely on an outdated amount when making a current application.
The safest approach is to proceed through the official NPCS portal and check the amount displayed before completing payment.
You should also be aware that the final amount may depend on the payment channel and any applicable convenience or transaction fees.
Travel tip: Don’t rely on screenshots or old social media posts showing a particular fee. Government service fees can change, so always check the official portal when you apply.
Step-by-Step Guide to Getting a Police Clearance
The National Police Clearance application can be broken down into four main stages: online registration and appointment, payment, biometric and photograph capture, and clearance release. The PNP’s official tutorial follows this basic sequence.
Step 1: Visit the Official National Police Clearance System Website
Begin your application through the official National Police Clearance System.
Official National Police Clearance System
This is an important first step because police clearance applications involve sensitive personal information.
Avoid clicking on advertisements, social-media posts, or unfamiliar websites offering to “process” your police clearance for you. Using an unofficial website can expose you to unnecessary fees and potential privacy or security risks.
The official NPCS website identifies itself as the National Police Clearance System and provides a nationwide police clearance application service.
Step 2: Create an NPCS Account
If you are a first-time applicant, create an account through the online system.
You will be asked to provide personal information and account details. Use an email address you regularly check, as it may be needed for account-related communication or password recovery.
Choose your password carefully and keep your login information secure.
If you already have an account, log in instead of creating another account unnecessarily.
The NPCS also provides an online password-reset facility for registered users who have forgotten their login credentials.
Step 3: Complete Your Personal Information
Once you are inside the system, complete your profile and application information.
This is the part where you should slow down rather than rush through the form.
Enter your personal details exactly and carefully. Pay particular attention to:
- Full name
- Date of birth
- Place of birth
- Address
- Civil status
- Contact information
- Other identifying information requested by the system
Use your government-issued ID and other official documents as references when entering your information.
Why accuracy matters
A police clearance is an identity-sensitive document. If you accidentally misspell your name or enter an incorrect birth date, the information may not match the identification document you present at the police station.
A small typo can turn a simple appointment into a verification problem.
Before clicking the final confirmation button, take a few minutes to review everything.
Step 4: Select Your Police Station
The online system will ask you to choose the police station where you will complete the in-person portion of your application.
Choose a station that is convenient for you, particularly if you live in a busy metropolitan area where traffic can make even a short trip surprisingly time-consuming.
Consider:
- Travel time
- Public transportation access
- Parking availability
- Your work or school schedule
- Appointment availability
- Distance from your home
Remember that your online application is tied to the appointment and selected police station, so don’t casually choose a location simply because it appears first on the list.
Step 5: Choose an Appointment Date and Time
After selecting the station, choose from the available appointment schedules.
Pick a date when you can comfortably arrive on time.
If you are applying because you are starting a new job, submitting documents for an overseas opportunity, or preparing for an immigration application, avoid scheduling your police clearance immediately before your deadline.
Giving yourself extra time is particularly useful if your application requires additional verification.
Once your appointment is confirmed, save the reference number.
Step 6: Pay the Required Fee
Proceed to payment using the options available through the NPCS.
Before paying, review the transaction details carefully.
Make sure you are paying for the correct application and that your appointment information is correct.
After completing the transaction, save your payment confirmation or electronic receipt.
A screenshot is useful as a backup, especially if you are relying on your mobile phone during your appointment.
Step 7: Prepare for Your Appointment
The night before your appointment, prepare everything in one place.
A simple checklist can help:
- Valid government-issued ID
- NPCS appointment reference number
- Payment confirmation or receipt
- Phone with access to your email or NPCS information
- Other documents specifically requested for your situation
Avoid leaving your ID in your other bag or wallet. It sounds obvious, but forgetting the required identification is one of the easiest ways to turn a quick government transaction into a wasted trip.
Step 8: Go to the Selected Police Station
On your appointment date, proceed to the police station you selected online.
The official NPCS instructions specifically tell applicants to proceed to their selected police station on their appointment date and present their valid ID, proof of payment, and NPC appointment reference number.
Give yourself enough travel time.
If you are coming from another city or municipality, consider traffic and possible delays. In Metro Manila, for example, a trip that looks short on a map can take considerably longer during peak hours.
Arriving early also gives you time to locate the correct office and settle in before your appointment.
Step 9: Present Your Requirements
At the police station, present the required documents to the personnel handling the National Police Clearance process.
Your identity will be checked against the information you submitted online.
This is where having accurate information becomes especially important. If your online application and identification document contain inconsistent details, personnel may need to clarify the discrepancy before continuing.
Step 10: Have Your Biometrics Captured
The next part of the process involves biometric capture.
The official NPCS guide identifies biometric, photographic, and signature capture as part of the police clearance processing procedure.
Your fingerprints and other biometric information help establish that the person applying for the clearance is the same person whose information is being checked.
The process is generally straightforward, but make sure your fingers and hands are reasonably clean and dry before fingerprint capture. Excessive moisture, dirt, or substances on your fingers can sometimes make biometric capture less convenient.
Step 11: Have Your Photograph and Signature Taken
Your photograph and digital signature will also be captured as part of the application.
This is another reason why personal appearance is necessary.
Unlike some online transactions that can be completed entirely from home, the police clearance process requires the PNP to verify the applicant’s identity in person.
Once your photograph, biometrics, and signature have been recorded, your application can move into the verification stage.
Step 12: Wait for Verification
After you submit your information, the PNP system checks the relevant records.
The official application guide instructs applicants to wait for their name to be called for verification or the release of the National Police Clearance.
For many applicants, this can be a straightforward process.
However, some applications may require additional verification.
What does a “hit” mean?
A “hit” generally means that the system has identified a possible matching record that requires further verification.
It is important not to panic if you hear that your application has a hit.
A hit does not automatically mean that the applicant has a criminal record.
Names can be similar or identical, and the PNP may need to determine whether the record belongs to the applicant or another individual.
If your application is flagged for additional verification, follow the instructions provided by the police personnel.
This is also why applying well in advance of an important deadline is advisable.
Step 13: Receive Your National Police Clearance
Once the verification process is complete and there are no unresolved issues, your National Police Clearance can be released in accordance with the applicable processing procedure.
Before leaving the police station, inspect the document.
Check your:
- Full name
- Date of birth
- Other personal details
- Clearance information
- Document or clearance number
- Date of issuance
If you spot an error, bring it to the attention of the appropriate personnel immediately.
Don’t assume that a minor mistake will not matter. If you are submitting the clearance to an employer, embassy, immigration authority, or another government office, the information on the document may need to match your other records exactly.
What If You Already Have an NPCS Account?
If you previously applied for a National Police Clearance, you may already have an account in the system.
Rather than creating a new account, try logging in using your existing credentials.
If you have forgotten your password, the NPCS provides an online password-reset option. The system notes that password-reset requests are limited to three times per day.
Keep your registered email address accessible because it may be needed for account recovery.
Can You Apply for a Police Clearance Online?
Yes, but the process isn’t entirely online for a regular application.
The online system handles much of the administrative portion of the application, including registration, appointment scheduling, and payment.
However, applicants still need to appear at their selected police station for identity verification, biometric capture, photograph, and signature.
Think of the process as online preparation followed by in-person verification.
This is considerably more convenient than completing every step at the police station, but applicants should still plan for a physical visit.
Can Someone Else Get Your Police Clearance for You?
For a regular application involving biometric and identity verification, applicants should expect to appear in person at the selected police station.
The purpose of the in-person stage is to verify the applicant’s identity and capture biometrics, a photograph, and a signature.
The NPCS, however, maintains special procedures for certain circumstances. Its website currently lists clearance certification services for categories including Filipino citizens working or based abroad, bedridden applicants, petitioners for probation or bail, and deceased persons.
If you fall into one of these special categories, don’t simply follow the standard application procedure. Check the specific NPCS instructions for your situation.
Police Clearance for Filipinos Working or Living Abroad
Filipinos already abroad may follow a different process than applicants residing in the Philippines.
The NPCS currently provides a Clearance Certification service specifically listing Filipino citizens working or based in another country among the categories covered by the special process.
The NPCS certification instructions indicate that applicants in this category may need to provide additional documents, including a recent 2×2 photograph with a white background, a selfie while holding a government-issued ID, a photocopy of a passport, proof of being an overseas Filipino worker, and an ID showing a Philippine address, depending on the application.
Because requirements can vary according to the applicant’s circumstances, overseas Filipinos should review the latest NPCS instructions before submitting documents.
Tips to Make Your Police Clearance Application Easier
Apply Before You Actually Need It
If your employer tells you that your police clearance is due next week, don’t wait until the day before the deadline.
Although the standard process can be relatively quick, an application requiring additional verification can take longer.
Give yourself a buffer, particularly if the clearance is needed for an important employment, immigration, or overseas transaction.
Check Your Name Carefully
Use the same spelling of your name that appears on your official documents.
Pay particular attention if you have:
- Multiple given names
- A hyphenated surname
- A recently changed surname
- A middle-name discrepancy
- Different spellings across old and new IDs
These details may seem minor, but government records depend heavily on accurate identity information.
Take a Screenshot of Everything
After booking your appointment and paying the fee, save screenshots of:
- Appointment confirmation
- Reference number
- Payment confirmation
- Important application details
This gives you a backup if you have difficulty accessing your email or online account at the police station.
Choose an Appointment Near Your Home or Workplace
Convenience matters.
If you work in Makati but live in Quezon City, for example, you may want to choose the station that fits more naturally into your daily route.
A convenient appointment can save you hours of travel time.
Don’t Forget Your Original ID
Your appointment reference number cannot replace your identification document.
Before leaving home, physically check that your ID is in your wallet, bag, or document envelope.
Wear Something Presentable
Your photograph will be part of your official clearance, so it is sensible to wear something neat and presentable.
There is generally no need to dress formally unless your specific office has additional requirements, but avoid wearing clothing you wouldn’t want appearing on an official document.
Keep Your Clearance Safe
Once you receive your clearance, store the original document in a secure place.
If you know you will need to submit copies, scan it or make a clear digital copy for your personal records.
Do not casually share photos of the entire document online, as it contains personal information that could be misused.
What Happens If Your Information Is Incorrect?
If you notice that your personal information is incorrect during the application, tell the PNP personnel handling your transaction.
Do not wait until you are already submitting the document to an employer or government office.
If the mistake originates from information entered during online registration, personnel may advise you on the appropriate correction procedure.
The important lesson is simple: review your application before submitting it.
Taking five minutes to carefully check your details online can save considerably more time later.
How to Verify a National Police Clearance
The official NPCS website also provides an online verification facility.
A clearance can be checked using the applicant’s clearance number and surname on the NPCS verification page.
This feature is useful when an organization needs to confirm the authenticity or status of a National Police Clearance.
Verify a National Police Clearance
Is a Police Clearance Required for Travel?
A police clearance is not a standard travel document for ordinary tourist travel.
Most Filipinos traveling overseas as tourists will not need to obtain a police clearance simply to leave the Philippines.
However, police or criminal-record certificates can be required for certain immigration, residency, citizenship, work, study, or long-term visa applications.
If you are preparing documents for an overseas application, carefully read the requirements of the relevant embassy, immigration authority, employer, or school.
Also check whether they require a PNP National Police Clearance, NBI Clearance, police certificate, or another specific document.
These terms are not automatically interchangeable.
Frequently Asked Questions About Police Clearance in the Philippines
How do I get a police clearance in the Philippines?
Register through the official National Police Clearance System, complete your personal information, select a police station and appointment schedule, pay the applicable fee, and go personally to your selected police station. There, you will present your requirements and undergo biometric, photographic, and signature capture before the verification and release process.
What are the requirements for police clearance?
For a standard application, prepare one valid government-issued ID, your NPCS appointment reference number, and, if applicable, proof of payment or payment confirmation. You will also need to appear in person for biometric, photograph, and signature capture.
Do I need an appointment?
The current National Police Clearance System is designed around online registration and appointment setting. Applicants should complete the online process and select their appointment before going to the police station.
Can I walk into any police station?
For the regular NPCS process, applicants are instructed to proceed to the selected police station on the date of their appointment.
Do not assume that you can simply walk into any police station and complete an appointment booked elsewhere.
How long does it take to get a police clearance?
The actual processing time can vary depending on the police station, appointment volume, system conditions, and whether your application requires additional verification.
Applications without issues may be processed relatively quickly, while applications requiring further verification can take longer.
What is a police clearance “hit”?
A hit indicates that the system has identified a possible matching record that needs further verification. It does not, by itself, establish that the applicant has a criminal record.
If your application receives a hit, follow the instructions provided by the PNP personnel handling your application.
Can I get police clearance if I have no criminal record?
Yes. The purpose of the clearance process is to check the applicant against relevant PNP records. The resulting document reflects the outcome of that verification.
A hit should not be automatically interpreted as proof of a criminal record, as further verification may be necessary.
Can first-time job seekers get a free police clearance?
Eligible first-time job seekers may qualify for government-service fee exemptions under applicable law and procedures. Because eligibility and documentary requirements must be established, check with the relevant PNP office and your barangay before assuming that your fee will automatically be waived.
Is police clearance the same as NBI clearance?
No. They are issued through different agencies and are separate documents. Always obtain the specific clearance required by the organization requesting your documents.
Can I verify my police clearance online?
Yes. The official NPCS provides an online verification facility to check a clearance using the required information.
Final Checklist Before Your Appointment
Before leaving home, run through this quick checklist:
- I have my original valid government-issued ID.
- I know the date and time of my NPCS appointment.
- I have my appointment/reference number.
- I have my payment confirmation or receipt, if applicable.
- The information in my online application matches my ID.
- I know the exact police station where my appointment is scheduled.
- I have enough travel time to arrive on schedule.
- I have saved screenshots of my appointment and payment information.
- I know exactly why I need the clearance and which organization will receive it.
Final Thoughts
Getting a National Police Clearance in the Philippines is now a much more organized process because much of the application can be completed online before you visit a police station. The key is to treat the online registration as carefully as you would any other government transaction.
Start on the official NPCS website, enter your personal information accurately, select a convenient appointment time, keep your reference number and payment confirmation, and bring the required identification documents to your selected police station.
The in-person portion is generally straightforward: present your documents, complete biometric and identity verification, have your photograph and signature captured, and wait for the verification or release of your clearance.
Most importantly, don’t wait until the last minute. If your police clearance is needed for a job application, overseas employment, immigration process, visa application, or another important transaction, applying early gives you enough time to deal with unexpected delays or additional verification.
And before you begin, always check the official NPCS website for the latest requirements, appointment procedures, and applicable fees. Government procedures can change, and the information displayed in the official system should take priority over older blog posts, screenshots, or social media advice.
Follow us on Facebook and Twitter.
Read: KATSEYE’s Sophia Laforteza Pauses Group Activities to Focus on Mental Well-Being